How to Remove Thermostatic Shower Valve Trim


1. Remove Volume Control Handles (if Present)
Contemporary Volume Control Levers

- If your shower has the contemporary volume control handles, unscrew and remove the Volume Control Levers by turning them counterclockwise ↺.
Traditional Volume Control Levers

- If your shower has the traditional volume control handles, unscrew and remove the holding screws at the top of the levers by turning them counterclockwise ↺.

- Lift off and remove the Volume Control Levers.
2. Remove the Temperature Control Handle
Temperature Control Handle with Side Set Screw

- If your shower has a temperature control handle which is held in place with a side set screw, unscrew and loosen the set screw on the side of the handle by turning it counterclockwise ↺ with a 5/64" Allen key.
- Pull and lift off the temperature control handle.
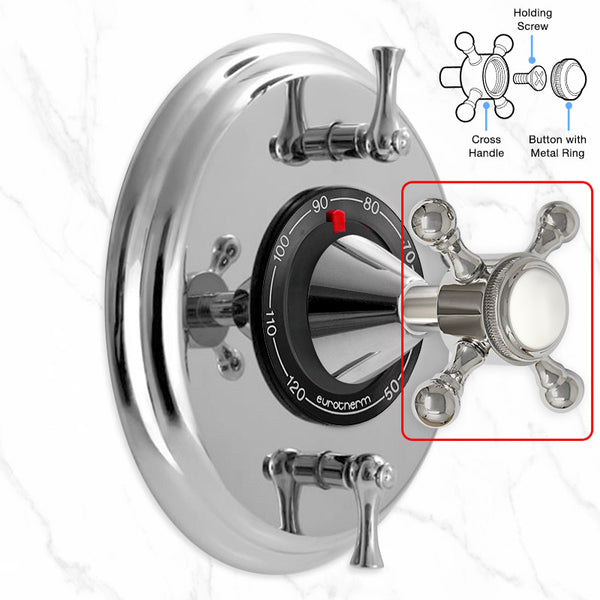
Cross Temperature Control Handle

- If your shower has a cross temperature control handle, unscrew and remove the button with metal ring by turning it counterclockwise ↺.
- Remove the holding screw at the center of the handle by using a Phillips screwdriver and turning counterclockwise ↺.
- Pull and lift off the temperature control cross handle.
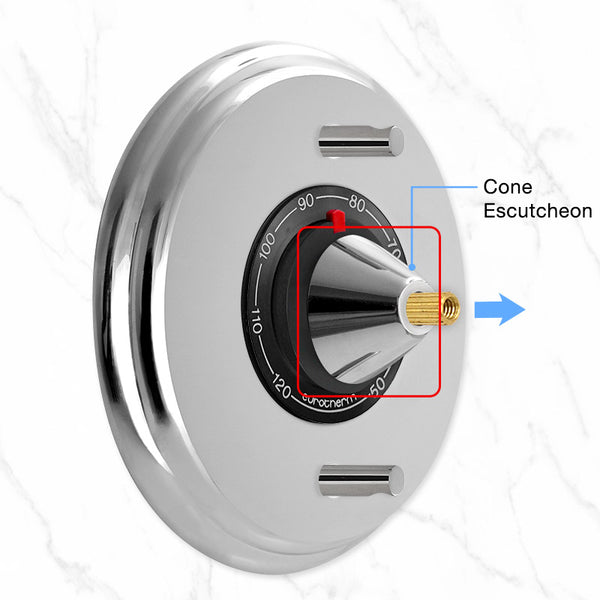
3. Remove the Cone Escutcheon

- Pull and lift off the Cone Escutcheon. (On some shower systems, turn the escutcheon counterclockwise ↺ using a bare hand to unscrew it and then lift it off.)
4. Remove the Pointer Assembly

- Using a 1/8" Allen key, unscrew and loosen the set screws on the Pointer Assembly. (Make sure not to lose them or make them fall down the drain.)
- Pull and lift off the Pointer Assembly.
- View Pointer Assemblies
5. Remove the Swivel Bushing

- Unscrew and lift off the Swivel Bushing by turning it counterclockwise ↺.
- View Swivel Bushing
6. Remove the Temperature Dial and Black Adapter

- Lift off and remove the Temperature Dial and Black Adapter.

7. Remove the Valve Cover Plate

- Lift off and remove the Valve Cover Plate.

- View our Thermostatic Valves and locate the valve that looks like the one in your shower wall, so you can shop for the right replacement parts for your thermostatic shower valve.
- If you would like us to help you identify your shower valve, take a photograph of the in-wall thermostatic valve and send it to us via text message or email.

